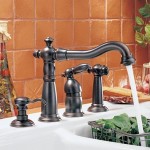
Pouvez-vous me donner un guide étape par étape pour changer une laveuse? Lisez ce guide étape par étape de remplacement de la rondelle de robinet qui fuit, puis, vous pouvez réparer vous-même le robinet qui fuit sans appeler un service de plombier.
Remplacement de la rondelle de robinet
Les robinets qui fuient sont l'un des problèmes les plus courants rencontrent les propriétaires. La réparation de ces fuites vous-même peut être plus facile que de traiter avec des entrepreneurs en plomberie peu fiables, et coûte certainement moins cher que l'embauche d'une entreprise de services de franchise. La réparation d'un robinet qui fuit est relativement simple, Mais vous voudrez peut-être considérer “Remplacement du robinet” avec un robinet plus récent. Les robinets plus récents ont des cartouches à disque en céramique et d'autres conceptions sans gaspillage qui permettent des années de fonctionnement sans goutte. Une chose dont vous pouvez être certain, Si vous décidez de remplacer les rondelles usées, Finalement, ils se décomposeront dans certains cas plus tôt que tard.
Ces robinets plus anciens s'appuient sur une rondelle en caoutchouc comprimant sur un siège métallique pour former un joint qui empêche l'eau de passer au bec, Lorsque les êtres d'eau passent à travers le bec avec la poignée en position hors, Vous avez une goutte. Ces fuites se produiront généralement sur le côté chaud du robinet car l'eau chaude adoucira la rondelle. La compression constante de la rondelle molle sur le siège métallique provoque l'usure de la rondelle. Peu importe où la fuite se produit, Il est toujours préférable de remplacer tous les sièges, rondelles, et les vis de laveuse en laiton en même temps. Le siège est en laiton doux et peut être porté ou avoir une bavure qui endommage la laveuse, Avec tout, il est également logique de changer le siège. Dans certains cas, le siège ne sera pas amovible, mais la plupart sont. Les sièges amovibles auront un trou carré ou hexagonal à travers le centre du siège pour accepter une clé à tige. Les pièces sont peu coûteuses, Et il n'y a pas beaucoup de travail supplémentaire impliqué dans le changement de toutes les parties discutées ci-dessus.
Avant de commencer, assurez-vous de savoir où se trouve la soupape d'arrêt principale de l'eau. Tu ne devrais pas avoir besoin d'éteindre l'eau vers la maison, mais juste au cas où tu as un problème, c'est bon à savoir. Il est temps de remplacer un vieux robinet? Commencez à économiser jusqu'à 40% sur les marques pour votre cuisine et votre salle de bain.
1. Fermer l'eau.
Au-dessous de l'évier, il devrait y avoir deux ou deux arrêts d'angle qui alimentent le robinet. Lorsqu'il est tourné dans le sens horaire, ces soupapes doivent arrêter l'écoulement de l'eau vers les poignées. Allumez le robinet pendant que les arrêts d'angle sont fermés, Il ne devrait pas y avoir d'eau qui coule. Dans le cas, l'eau coule toujours, vous pouvez avoir de mauvaises valves, Ce qui remplacer n'est pas aussi simple que le remplacement des rondelles. Vous devrez peut-être éteindre la conduite d'eau avant de continuer.
2. Retirez les poignées.
Une fois que l'écoulement de l'eau à travers le robinet s'arrête, vous pouvez commencer à démanteler les poignées. Le plus souvent, les poignées sont fixées par des vis qui resserrent la poignée à la tige que vous ne pouvez pas voir à ce stade. La vis est souvent dissimulée par un bouton ou un autre capuchon décoratif qui pousse simplement dans la poignée. Il peut y avoir une petite encoche dans ce bouton où vous pouvez enlever doucement avec un petit tournevis ou une lame de couteau pour le retirer.
Une fois le bouton retiré, la vis qui sécurise la poignée sur la tige doit être visible. Desserrer la vis pour retirer la poignée. Dans certains cas, Les vis de poignée dans la baignoire et les robinets de douche peuvent être trop corrodés pour retirer avec un tournevis, et peut nécessiter l'utilisation d'un sortie facile ou dans des cas plus graves, la vis peut être forée.
3. Retirer la tige.
En dessous de la poignée, il y aura un écrou qui est enfilé dans le corps de la valve, Souvent appelé l'écrou d'emballage. Retirez l'écrou d'emballage en le tournant dans le sens antihoraire. Une fois l'écrou-emballage retiré, vous pouvez placer la poignée en haut de la tige, Vous n'avez pas besoin de réinstaller la vis de poignée pour le moment, et faire tourner la tige dans le sens antihoraire pour le retirer du corps de soupape.
Avec la tige supprimée, une enquête est requise. Première, De ce que vous aurez besoin? La rondelle est fixée par une petite vis en laiton tout en bas de la tige. Seconde, Quel siège est requis? Regardez à l'intérieur du corps de soupape où la tige résidait pour résider, Il y aura une petite bague en laiton circulaire. C'est ton siège. Les sièges amovibles auront un trou squre à travers le centre qui acceptera une clé de siège. Montez la clé du siège dans le siège et tournez dans le sens antihoraire pour le retirer. Troisième, Si la tige est remplacée? Votre alimentation de plomberie locale aura de nombreuses pièces de robinet de remplacement disponibles. Apportez le siège et en tige avec vous si vous avez besoin d'aide pour identifier les pièces..
Si le siège ne peut pas être supprimé, il existe des outils de resurfaçage disponibles. Il y a peu de problèmes avec ce scénario. Première, Resurfacer les sièges n'est pas très efficace, Et plus que probablement, Vous ne possédez pas d'outil de resurfaçage. À ce stade, si vous êtes prêt à acheter des outils supplémentaires, et des pièces, et je ne peux pas garantir combien de temps cette réparation durera, je recommanderais d'acheter un robinet à prix raisonnable. Vous serez plus heureux à long terme.
Si une partie de l'ancienne laveuse manque, elle peut être tombée dans le corps de la valve lorsque l'eau a été éteinte. Vous voudrez peut-être ouvrir les vannes sous l'évier très légèrement avec les tiges retirées pour nettoyer les débris hors du corps de la vanne. Les débris laissés dans la tige de soupape peuvent interférer correctement avec les nouveaux laveurs, et peut provoquer une condition de fuite différente même si vous avez réussi à remplacer les sièges et la rondelle. Vous devrez retirer à nouveau la tige pour retirer ces débris du corps de soupape.
4. Remplacer la laveuse et le siège.
Avec un peu de chance, vous êtes revenu de la fourniture de plomberie ou de la quincaillerie avec de nouveaux sièges, rondelles, et vis en laiton pour chaque poignée, ou alternativement de nouvelles tiges. Si vous avez une nouvelle tige complète, vous pouvez simplement la redémarrer dans le corps de la valve et réassembler la poignée. Si vous ne trouvez pas un nouveau siège sur la clé à tige et le baissez-le dans le corps de soupape. Serrez le nouveau siège en tournant la clé à tige dans le sens des aiguilles d'une montre. Installez une nouvelle rondelle au bas de la tige et fixez avec une nouvelle vis en laiton. Fixez la tige dans le corps de la valve. Répétez pour chaque poignée et allumez l'eau sous l'évier pour tester. En cas de succès, vous ne devriez pas avoir d'eau dégoulinant. Allumez et éteignez les poignées pour être certaine de bon fonctionnement.


