• Saltar al contenido principal
  • Saltar al menú secundario
  • Saltar a la barra lateral principal
Cuarto de baño-cocina-Faucets.com

Cuarto de baño-cocina-Faucets.com

Grifos de cocina modernos y diseños de herrajes para baños

  • Hogar
  • Catalogo de producto
  • Acerca de
  • Contacto
  • Baño
    • Grifos de baño
      • Grifos monomando de lavabo
      • Grifo de lavabo cromado
      • Mezclador de bidé
      • Grifos de Ducha
      • Grifo de la ducha de bañera
    • Hand Bidet Spray
    • Muebles de baño vanidad
    • Accesorios de baño
  • Cocina
    • Pull-out grifo de la cocina
    • Accesorios de cocina
    • Iluminación del gabinete de cocina
    • Fregaderos de cocina de acero inoxidable
  • Grifos
    • Grifo automático del sensor
    • Grifos de Plástico para Grifería
    • Grifo de un solo toque
    • Mantenimiento grifo
    • Aireadores de grifo de ahorro de agua
    • Instalación y reparación de grifos
  • Duchas
    • Cabezales de ducha de mano
    • Mangueras de ducha de mano
    • Titular de la ducha
    • Barra de ducha & Carril de deslizamiento
    • Cabinas de ducha
    • Cuarto de baño de vapor
    • Bañera de hidromasaje
  • Decoración para el Hogar
    • Evento de cocina y baño
    • Reparación de calentadores de agua caliente
  • Suministros de fontanería
    • Mangueras flexibles trenzadas
    • Válvula de ángulo de latón
    • Servicio de fontanero
    • Desagüe de desechos emergente
Estás aquí: Hogar / Desagüe de desechos emergente / Instalación de una nueva trampa en P debajo del lavabo del baño

Instalación de una nueva trampa en P debajo del lavabo del baño

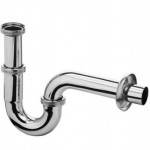
When you removed a clogged bathroom sink drain p-trap, you can install a new p-trap under your bathroom sink easy. If first time to install a new p-trap , Here’s a step-by-step User’s Manual & Owner’s Guide on how to install a new p-trap under your bathroom sink.

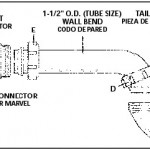
1. Make sure to buy the right p-trap. The correct pipe size is 1 1/2 inches for a bathroom trap. The easiest type to work with is PVC, but chromed metal looks better for exposed sinks. For a PVC trap, buy the package that comes with all the plastic gaskets and nuts. For a chromed trap, you’ll need rubber gaskets. The trap itself is 1 1/2-inch pipe, but the tailpiece from the sink is likely 1 1/4. You’ll need a transition gasket for this.

2. Test fit the p-trap onto the sink drain tailpiece and into the wall without the nuts. You may need to cut the tailpiece of the p-trap to fit into the wall drainpipe. The trap tailpiece should go as far as possible into the wall pipe. If the tailpiece is too short, you’ll need a 1 1/2-inch slip-joint extension to cover the distance. A slip-joint extension attaches to the trap tailpiece the same way the trap attaches to the sink drain tailpiece–a nut and gasket that creates a water-tight seal.

3. When the trap is cut to fit, slip the nut and then the 1 1/4-1 1/2-inch gasket over the sink tailpiece. Then slip the nut and 1 1/2-inch gasket over the trap tailpiece.

4. Assemble the p-trap. You will not need a gasket for this part if working with PVC, only a layer of pipe thread compound where the plastic surfaces meet. If working with chrome, spread thread compound on the surfaces where the gasket will touch. Make sure to tighten the nut on the p-trap snugly but not tight yet. This will give you flexibility to get the trap into place if needed.

5. Spread thread compound on the surfaces where the gaskets will touch on both the p-trap and wall pipe before setting it into place. Set the trap in place, and then slip the gaskets down the pipes to the threads, and then tighten the nuts over the gaskets hand tight. Finalmente, tighten the nut holding the p-trap together. If working with PVC and plastic gaskets, hand tight should be sufficient. With chrome, make the nuts hand tight plus a quarter turn with the channel locks or wrench.

6. To test your new trap, plug the sink and fill it completely. A full sink will fill the pipe and reveal any leaky spots right then. Now let the water go and watch for drips at all the trap’s connections. Make sure to touch the joints to feel for water, rather than just eyeballing. If you have a leak, tighten the nut a little more, wipe the joint dry and test again.

If you get persistent leaks, especially in one spot, check to make sure there’s not a problem with the gasket. Every professional at one point or another has forgotten one completely, so don’t feel so bad if you commit this heinous crime your first time out.

TAMBIÉN PODRÍA GUSTARTE

  • How to Repair or Fix a Leaky Kitchen Sink Drain Pipe
    Cómo reparar o arreglar una tubería de drenaje del fregadero de cocina con fugas
  • bathroom-p-trap
    Sifón en P para lavabo o lavabo de baño Sanliv
  • Sink Drain Trap Installation and Buying Guide
    Sink Drain P-Trap Guías de compra y consejos de instalación
  • How to Install a Bathtub Drain
    Guía de instalación del desagüe de la bañera y consejos
  • How to install Pop-up Wastes and Traps
    Los mejores consejos sobre cómo instalar trampas y desechos emergentes
  • Tips on Installing Pedestal Sinks
    Cómo instalar lavabos de pedestal y accesorios de grifería en el baño
  • How to Install a Bathroom Basin/Sink Faucet
    Cómo instalar un grifo de lavabo / lavabo en el baño
  • Graphite Black Bathroom Washbasin Tap Sink Faucet
    Cómo reemplazar un grifo del lavabo del baño con una sola manija
  • Bathroom Sink Drain Trap Installation DIY Tips
    Guía de instalación de la trampa de drenaje del fregadero y los desechos emergentes
  • Why Does My Vessel Sink Drain Slow photo
    Solución de problemas de desagües lentos del lavabo del baño
  • Clearing a Clogged Floor Drain pic
    Desagüe de un desagüe de piso obstruido
  • Kitchen and Bathroom Drain Plumbing Cleaning Tips
    Consejos para la limpieza de tuberías de desagües de cocina y baño

Archivado: Desagüe de desechos emergente Etiquetado con: Desagüe del lavabo del baño P-Trap, desagüe del fregadero de la cocina, Desagüe emergente

Barra lateral principal

Busca el sitio

Traducción

EnglishDeutschEspañolPortuguêsFrançaisItalianoРусскийالعربية日本語
Establecer como idioma predeterminado
 Editar Traducción

Tienda en línea Sanliv

Twin roll toilet tissue paper holder

Accesorios de plomería

  • Grifos automáticos
  • Accesorios de baño
  • Reposapiés de ducha plegable
  • Grifo de la cocina
  • Espejos del maquillaje de aumento
mezclador monomando para ducha y bañera
Philippe Stark grifos: Axor Starck Orgánica de Hansgrohe
Reposapiés de ducha Sanliv para afeitarse las piernas,Reposapiés de ducha montado en la pared,Ledge de soporte de pie de barra de latón moleteado,Negro mate
Grifo monomando extraíble para cocina dorado cepillado
Grifo de cocina abatible monomando de níquel cepillado
Reposapiés para ducha Sanliv,Reposapiés de esquina para afeitar las piernas,Borde de ducha con peldaño de barra de latón moleteado,Niquel pulido
Grifo para lavabo de baño con manija única de color negro mate
Níquel cepillado del estante de la pared del retrete del organizador del tenedor de la toalla del hotel

Derechos de autor © 2025 Baño-Cocina-Faucets.com con Mapa del sitio