• Saltar al contenido principal
  • Saltar al menú secundario
  • Saltar a la barra lateral principal
Cuarto de baño-cocina-Faucets.com

Cuarto de baño-cocina-Faucets.com

Grifos de cocina modernos y diseños de herrajes para baños

  • Hogar
  • Catalogo de producto
  • Acerca de
  • Contacto
  • Baño
    • Grifos de baño
      • Grifos monomando de lavabo
      • Grifo de lavabo cromado
      • Mezclador de bidé
      • Grifos de Ducha
      • Grifo de la ducha de bañera
    • Hand Bidet Spray
    • Muebles de baño vanidad
    • Accesorios de baño
  • Cocina
    • Pull-out grifo de la cocina
    • Accesorios de cocina
    • Iluminación del gabinete de cocina
    • Fregaderos de cocina de acero inoxidable
  • Grifos
    • Grifo automático del sensor
    • Grifos de Plástico para Grifería
    • Grifo de un solo toque
    • Mantenimiento grifo
    • Aireadores de grifo de ahorro de agua
    • Instalación y reparación de grifos
  • Duchas
    • Cabezales de ducha de mano
    • Mangueras de ducha de mano
    • Titular de la ducha
    • Barra de ducha & Carril de deslizamiento
    • Cabinas de ducha
    • Cuarto de baño de vapor
    • Bañera de hidromasaje
  • Decoración para el Hogar
    • Evento de cocina y baño
    • Reparación de calentadores de agua caliente
  • Suministros de fontanería
    • Mangueras flexibles trenzadas
    • Válvula de ángulo de latón
    • Servicio de fontanero
    • Desagüe de desechos emergente
Estás aquí: Hogar / Accesorios para el baño / Cómo reemplazar los accesorios del lavabo del baño

Cómo reemplazar los accesorios del lavabo del baño

Cómo reemplazar los accesorios del lavabo del baño? Maybe your old faucet drips, or maybe you’re just hoping to create a new look in your bathroom. Follow these steps to install new fixtures without a hassle.

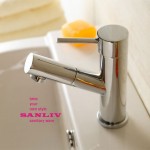
Brass Bathroom Sink Fixtures Picture

Paso 1: Turn the water off
Turn the water off at the shutoff valves and remove the hot and cold supply lines running from the shutoff valves to the faucet. Unscrew the nuts below the faucet using a basin wrench. Remove the old faucet and scrape any old putty or caulk from the basin.

Paso 2: Remove drain
Unscrew the nut that connects the drain to the flange using an adjustable wrench if you are replacing the pop-up drain. Then remove the drain flange from the T-connector.

If you can’t unscrew the drain flange from the T-connector, use a reciprocating saw with a metal-cutting blade and cut the drain assembly away just above the T-connector.

Paso 3: Check for a gasket
Check your new fixture for a gasket to seal between the faucet and the sink. If the faucet didn’t come with a gasket, liberally spread plumber’s putty on the bottom of the faucet and press it down until putty squeezes out from between the fixture and sink.

Make sure your new faucet fits your sink. Bring the old faucet to the hardware store when you buy the new one and measure them against each other. Make sure that your sink has enough holes to accommodate the new faucet.

Paso 4: Tighten the faucet
Tighten the nuts under the faucet with the basin wrench, making sure the faucet is straight and level. Then wrap the inlet pipes with Teflon tape to ensure a watertight seal.

Paso 5: Connect supply lines

Connect the supply lines to the inlet pipes on the faucet, wrap Teflon tape around the shutoff valve connections, and connect the other ends of the supply lines to the shutoff valves.

Paso 6: Assemble the new drain
Apply pipe joint compound to the new tailpiece and screw it into the T-connector. Then apply a rope of plumber’s putty to the underside of the drain flange and press it into the drain hole.

Paso 7: Connect the drain body
Apply pipe joint compound to the drain body and screw it into the drain flange. Then tighten the nut on the drain body, sealing the gasket and washer against the drain flange.

Make sure the branch of the T-connector faces the wall behind the sink.

Paso 8: Install the pop-up

Drop the pop-up into the drain with the hole in the back of the pop-up facing the back of the drain. Thread the pivot rod into the T-connector and through the hole in the pop-up. Then hand-tighten the pivot rod’s retaining nut enough that the rod can still move up and down.

Paso 9: Install the lift rod
Insert the pop-up’s lift rod through the hole in the top of the faucet and attach the clevis to the rod from beneath the sink. With the pop-up open, insert the lift rod through the nearest hole in the clevis, and then attach the spring clip to the rod on the other side of the clevis.

Paso 10: Compruebe si hay fugas
Unscrew the aerator from the faucet, turn the water on at the shutoff valves, and open the faucet. Let the water run for several minutes, check for leaks, and then reattach the aerator. If there aren’t any leaks, wash up with your new faucet fixture.

TAMBIÉN PODRÍA GUSTARTE

  • Graphite Black Bathroom Washbasin Tap Sink Faucet
    Cómo reemplazar un grifo del lavabo del baño con una sola manija
  • How Plumbers Replace Bathroom Sink Faucets photo
    Ideas de reemplazo del grifo del lavabo del baño de plomeros
  • Matte Black Single Lever Bathroom Basin Faucet
    Instalación del grifo: Cómo instalar un grifo para lavabo
  • How to Fix a Dripping Kitchen or Bathroom Faucet
    Cómo arreglar un grifo de cocina o baño que gotea
  • How to Install a Bathroom Basin/Sink Faucet
    Cómo instalar un grifo de lavabo / lavabo en el baño
  • How to Fix a Leaky Faucet, Faucet Repair
    Cómo arreglar un grifo con fugas, Reparación de grifos
  • How to install a bathroom sink and sink faucet
    Cómo instalar un lavabo y un grifo de lavabo
  • Tips on Installing Pedestal Sinks
    Cómo instalar lavabos de pedestal y accesorios de grifería en el baño
  • Repairing a Faucet when Water Leaks under the Sink
    Reparación de un grifo cuando hay fugas de agua debajo del fregadero
  • New Kitchen Sink Faucet Installation 1
    Nuevos consejos de bricolaje para la instalación de grifos de cocina
  • kitchen faucet and bathroom plumbing fixture repair parts
    Cómo quitar o reemplazar el cartucho del grifo de la ducha
  • Replacing Pull Out Kitchen Faucet And Bath Vanity
    Replacing Pull Out Kitchen Faucet And Bath Vanity

Archivado: Accesorios para el baño, Instalación y reparación de grifos Etiquetado con: Desagüe del lavabo del baño P-Trap, Accesorios de lavabo de baño, Desagüe emergente, Válvula de cierre de agua

Barra lateral principal

Busca el sitio

Traducción

EnglishDeutschEspañolPortuguêsFrançaisItalianoРусскийالعربية日本語
Establecer como idioma predeterminado
 Editar Traducción

Tienda en línea Sanliv

Twin roll toilet tissue paper holder

Accesorios de plomería

  • Grifos automáticos
  • Accesorios de baño
  • Reposapiés de ducha plegable
  • Grifo de la cocina
  • Espejos del maquillaje de aumento
Reposapiés de ducha Sanliv para afeitarse las piernas,Reposapiés de ducha montado en la pared,Ledge de soporte de pie de barra de latón moleteado,Negro mate
Reposapiés para ducha Sanliv,Reposapiés de esquina para afeitar las piernas,Borde de ducha con peldaño de barra de latón moleteado,Niquel pulido
Níquel cepillado del estante de la pared del retrete del organizador del tenedor de la toalla del hotel
Grifo monomando extraíble para cocina dorado cepillado
mezclador monomando para ducha y bañera
Philippe Stark grifos: Axor Starck Orgánica de Hansgrohe
Grifo para lavabo de baño con manija única de color negro mate
Grifo de cocina abatible monomando de níquel cepillado

Derechos de autor © 2025 Baño-Cocina-Faucets.com con Mapa del sitio