• Saltar al contenido principal
  • Saltar al menú secundario
  • Saltar a la barra lateral principal
Cuarto de baño-cocina-Faucets.com

Cuarto de baño-cocina-Faucets.com

Grifos de cocina modernos y diseños de herrajes para baños

  • Hogar
  • Catalogo de producto
  • Acerca de
  • Contacto
  • Baño
    • Grifos de baño
      • Grifos monomando de lavabo
      • Grifo de lavabo cromado
      • Mezclador de bidé
      • Grifos de Ducha
      • Grifo de la ducha de bañera
    • Hand Bidet Spray
    • Muebles de baño vanidad
    • Accesorios de baño
  • Cocina
    • Pull-out grifo de la cocina
    • Accesorios de cocina
    • Iluminación del gabinete de cocina
    • Fregaderos de cocina de acero inoxidable
  • Grifos
    • Grifo automático del sensor
    • Grifos de Plástico para Grifería
    • Grifo de un solo toque
    • Mantenimiento grifo
    • Aireadores de grifo de ahorro de agua
    • Instalación y reparación de grifos
  • Duchas
    • Cabezales de ducha de mano
    • Mangueras de ducha de mano
    • Titular de la ducha
    • Barra de ducha & Carril de deslizamiento
    • Cabinas de ducha
    • Cuarto de baño de vapor
    • Bañera de hidromasaje
  • Decoración para el Hogar
    • Evento de cocina y baño
    • Reparación de calentadores de agua caliente
  • Suministros de fontanería
    • Mangueras flexibles trenzadas
    • Válvula de ángulo de latón
    • Servicio de fontanero
    • Desagüe de desechos emergente
Estás aquí: Hogar / Instalación y reparación de grifos / Cómo instalar un grifo de lavabo / lavabo en el baño

Cómo instalar un grifo de lavabo / lavabo en el baño

How to Install a Bathroom Basin Faucet? Read our bathroom faucet installation & bathroom sink faucet replacement tips online. A bathroom faucet, also referred to as a lavatory faucet or basin faucet. You can save a lot of money by installing a new bathroom fixture yourself.

IMPORTANTE: Read this before you start

  • When replacing an old faucet there are generally three things to consider: how many holes your sink has, how far apart they are, and whether or not you will need to replace the drain.
  • Most bathroom sinks usually come with three different hole configurations. The most popular configuration is two holes four inches apart on center with a center hole between them (three holes total). Another similar configuration is two holes eight inches apart on center with a center hole between them (often called a spread set configuration). Finalmente, there might be just a single hole, which is a common configuration for newer sinks and faucets.
  • You will need to purchase a faucet that matches your particular hole pattern. It is not recommended that you try drilling holes in your sink or try to make a spread set fit in a 4 inch configuration. One exception to this rule, sin embargo, can be made for some single hole faucets that are designed with a wide base that will cover the extra holes in a 4-inch configuration.
  • Por lo general, it is a good idea to replace the drain when replacing the faucet. Típicamente, bathroom faucets are sold with pop-up drains but you can also get them with just a plug. If you do replace the drain, consider buying a new trap and tailpiece as well. It is much easier to work with new pipes than old and the cost is not prohibitive.

Remove the existing pop-up drain
1. Remove the nut above the P-trap and loosen the nut attached to the P-trap.
2. Remove the pop-up lever from the drain.
3. Loosen the lock nut holding the drain to the sink.
4. Unscrew the drain and the drain flange.

Install the new faucet and drain pop-up
1. Place Teflon paste or tape on the faucet stems.
2. If your faucet includes a rubber gasket, install it on the base of the faucet before inserting the faucet stems in the appropriate holes in the sink. If your faucet doesn’t include a gasket, run a line of caulk under the faucet before installing it.
3. Secure the nuts holding the faucet to the sink. Tighten the nuts by hand and then give them another quarter-turn with the basin wrench.
4. Connect the supply tubes to the faucet stems.
5. Apply Teflon paste to the shutoff valve threads, and tighten the coupling nuts to the faucet supply stems. Be sure not to overtighten.
6. Apply caulk to the underside of the drain flange, and press it into the drain hole.
7. Place the lock nut on the drain housing, then place the metal washer and the gasket onto the housing.
8. Screw the drain housing tightly to the flange. If the flange begins to rotate, hold it steady by inserting the plastic handle of your pliers.
9. Drop the pop-up drain into place, keeping the hole for the control pin toward the rear of the sink.
10. Place the bail lever in the side hole of the drain assembly so that the control pin fits through the appropriate hole in the pop-up drain.
11. Set the drain rod into the hole in the faucet, and attach the connecting link to the faucet rod by tightening the attached screw. Make sure the pop-up is up and the drain rod is down; then attach the bail lever to the connection link using the V-clip. The pop-up should go down when the lever is pulled up.
12. Attach the new drain extension to the P-trap.
13. Clean the supply tubes by removing the aerator from the faucet and turning on the water. While the water is running, check for leaks. Shut the water off after you are certain there are no leaks, and replace the aerator.

TAMBIÉN PODRÍA GUSTARTE

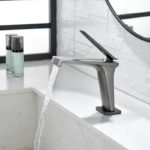
  • Graphite Black Bathroom Washbasin Tap Sink Faucet
    Cómo reemplazar un grifo del lavabo del baño con una sola manija
  • Tips on Installing Pedestal Sinks
    Cómo instalar lavabos de pedestal y accesorios de grifería en el baño
  • How to Install a New Bathroom Sink Drain Plug
    Cómo instalar un nuevo tapón de desagüe del lavabo del baño
  • Installing new bathroom basin faucets and sink drains
    Cómo instalar desagües para lavabos y nuevos grifos para lavabos
  • Easy Faucet installation Tips for most of homeowners
    Consejos de instalación de Easy Faucet para la mayoría de los propietarios
  • Matte Black Single Lever Bathroom Basin Faucet
    Instalación del grifo: Cómo instalar un grifo para lavabo
  • How to Install Vessel Sink Faucets
    Cómo instalar el grifo del baño del lavabo del recipiente
  • Tips on How to Replace a Bathtub Drain Stopper
    Consejos sobre cómo reemplazar un tapón de drenaje de bañera
  • How to install a bathroom sink and sink faucet
    Cómo instalar un lavabo y un grifo de lavabo
  • Plumbing Faucet Fixture Parts-A03
    Piezas de accesorios de grifería de plomería A03
  • Kitchen Spray Set
    Fregadero de cocina, manguera rociadora y cabezal rociador manual
  • Brass Bathroom Sink Fixtures Picture
    Cómo reemplazar los accesorios del lavabo del baño

Archivado: Instalación y reparación de grifos Etiquetado con: grifo del lavabo del baño, Grifos de baño con descuento, Reemplazo de grifos, Cómo instalar faucet

Barra lateral principal

Busca el sitio

Traducción

EnglishDeutschEspañolPortuguêsFrançaisItalianoРусскийالعربية日本語
Establecer como idioma predeterminado
 Editar Traducción

Tienda en línea Sanliv

Twin roll toilet tissue paper holder

Accesorios de plomería

  • Grifos automáticos
  • Accesorios de baño
  • Reposapiés de ducha plegable
  • Grifo de la cocina
  • Espejos del maquillaje de aumento
mezclador monomando para ducha y bañera
Grifo para lavabo de baño con manija única de color negro mate
Níquel cepillado del estante de la pared del retrete del organizador del tenedor de la toalla del hotel
Philippe Stark grifos: Axor Starck Orgánica de Hansgrohe
Grifo monomando extraíble para cocina dorado cepillado
Reposapiés para ducha Sanliv,Reposapiés de esquina para afeitar las piernas,Borde de ducha con peldaño de barra de latón moleteado,Niquel pulido
Grifo de cocina abatible monomando de níquel cepillado
Reposapiés de ducha Sanliv para afeitarse las piernas,Reposapiés de ducha montado en la pared,Ledge de soporte de pie de barra de latón moleteado,Negro mate

Derechos de autor © 2025 Baño-Cocina-Faucets.com con Mapa del sitio