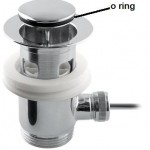
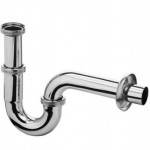
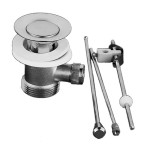
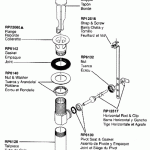
حمام بالوعة فخ والمنبثقة استنزاف تركيب النفايات ليست وظيفة بسيطة للجميع القيام به DIY في منازلهم. جميع المعلومات والصور المقدمة هي للاسترشاد فقط, يرجى الحصول على الأدلة الفنية مصنع كامل قبل الشروع في أي تركيب و / أو إصلاح. إذا كنت تشعر بأنك لا يمكن إدارة مع السباكة حمامك, يرجى الاتصال سباك المهنية الموصى بها للقيام بهذه المهمة بشكل صحيح بالنسبة لك.
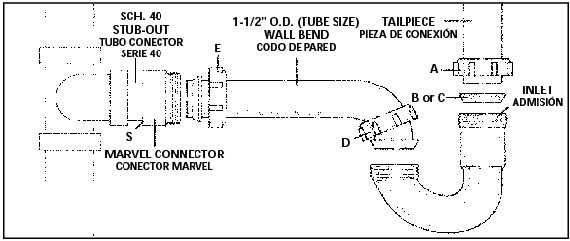
الأخطاء الأكثر شيوعا
- انتهاك أو تجاهل القيود كود,
- عدم تثبيت D / W / V مع ما لا يقل عن 1/4″ منحدر في الأنابيب قدم واحدة,
- لا التنفيس بشكل صحيح أو محاصرة جميع المباريات,
- ربط الكثير من المباريات لاستنزاف أو تنفيس الأنابيب,
- باستخدام الأنابيب التي هي صغيرة جدا,
- عدم توفير ما يكفي من cleanouts أو عدم توفير cleanouts في الأماكن المنصوص عليها,
- التنفيس المباراة بعيدا عن فخ لاعبا اساسيا في,
- لا محاذاة الأنابيب بشكل صحيح في التجهيزات أو وقف الصمامات. (سوف يجبر الجوز على عصابة ضغط في زاوية عندما الأنبوب هو في زاوية تسبب تسرب.)
- باستخدام المناسب في موقف خاطئ,
- تركيب السباكة الخام في موقع خاطئ,
- تقليل حجم الأنابيب كما تشغيل أنابيب المصب,
- قطع الأنابيب وقتا طويلا وعدم السماح للريدج في التجهيزات, و
- مما اضطر فخ والذراع النفايات التجهيزات خارج المحاذاة، ووضع الكثير من الضغط على المكسرات وغسالات في أنابيب.
- تأكد يتم وضع أنابيب ضغط في التجهيزات بحيث يتم تشديد بالتساوي
تركيب هجرة النفايات تنفيس الأنابيب
Running the pipe can be tricky. All different kinds of fittings are available to turn in different and receive different sizes of pipe at various angles. One fitting may need 3 opening ports, كل التوفيق أنبوب حجم. You will have to plan your runs and buy the necessary fittings (always get a few extra).
شراء أفضل جدا دوش الحمام الخاص بك.
نضع في اعتبارنا أن رموز قد ينظم كيف يمكن استخدام التجهيزات * (i.e. لا يجوز استخدام المحملات الصحية في عمودي إلى أفقي الاتصالات يجب استخدام اتصال الاجتياح طويلة هنا). You will need to know the diameter of your pipes, their angles, the code and their direction to determine each fitting.
While planning may take some time and study, the cutting and assembly of plastic pipe is very simple.
1. Using a back saw or a fine toothed saw, cut the pipe the required length, remembering that the pipe fits into the fitting a prescribed distance for each diameter of pipe.
2. Use a small knife or rough sandpaper to remove the “burr” off the freshly cut pipe.
3. With a rag and some cleaning solvent, clean the ends of the pipe and the inside of fitting where the pipe will join. (ABS does not need this solvent or primer. It can be wiped clean with a damp rag.)
4. The glue will dry almost immediately and you can never get it unglued. To change the connection you must cut out the fitting and start over. Because of this, you want to be sure you have it right the first time. This is very easy in some cases, but often you will have a number of pipes coming into a fitting from several different angles. All of these must meet correctly once they are permanently glued. To assure this, “dry fit” the fittings and pipe by cutting and assembling everything without glue to assure it all fits at the correct angles and dimensions.
5. Make marks across fittings and pipe so that once the pipes are removed and the glue is spread, you will know exactly how to realign everything when the pipes are inserted permanently into the fitting. (Be sure the marks or lines are long enough on the pipe so that they will not be covered by the glue you will spread on the pipe.)
6. نشر كمية سخية من الغراء الأنابيب المطلوبة حول نهاية الأنبوب، وعلى الداخل من المناسب مع dobber.
7. Insert the pipe into the fitting until it “bottoms out” and give it a little twist to be sure that the glue is spread evenly.
One of the most difficult parts about running drain waste vent pipes is drilling the large (2-3″) holes necessary to run the pipe. You will need to purchase, borrow or rent special heavy duty plumbers’ bits that are notched to fit 1 1/2″, 2″ و 2 1/2″ يضخ. The cheaper hole saw is just too difficult when you are doing a large project. You will also need a heavy duty 1/2″ or 3/4″ drill (preferably a right angle drill or one with a right angle attachment). كن حذرا, as drilling with these large bits often causes the bit to bind and the drill to spin.

