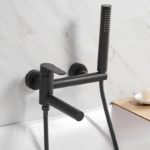
How To Repair the Shower Faucet: Check Shutoff Valve. 2 and 3 Handle Bath Tub and Shower Faucet Repair Tips. Leaky two-handle shower faucet Maintenance and Repair will help you to save money could be being wasted in your home.
If you’re not a plumber now, you will be one after this! You know the problem: the shower head leaks all the time, or the tub faucet is always dripping. Both are maddening. You must get behind the wall to fix this one. First, check the temperature of the water leaking from faucet or shower head. If It’s hot, then that is the valve body you must disassemble. If cold, then disassemble the cold. Finally: hang in there.
Ingredients
Can of penetrating oil Necessary washers (seat, “O” ring, bonnet)
Can of putty
Tools for Shower Faucet Repair
Medium flat blade screwdriver and/or Phillips head
Hammer
Adjustable wrench
Pliers
Set of socket wrenches
Small cold chisel
Penknife
Flashlight
Approximate Time: 60 Minutes
Two and Three Handle Bath Tub and Shower Faucet Repair Steps:
1. Shut off water supply either in the bathroom or at the main cutoff valve in the basement.
2. Turn faucet handle to “open” position and allow water to drain.
3. Remove faucet handle screw, turning counterclockwise. Sometimes screw is located beneath snap-on cover, and this cover must be pried off with screwdriver or knife.
4. Pull off handle. If handle is corroded and stuck to stem within, apply several drops of penetrating oil and allow to sit for a few minutes.
Then tap handle slightly with handle of hammer until it loosens. Do this gently!
5. Remove escutcheon, turning counterclockwise. If there is a set screw at the side or bottom of escutcheon, this will have to be loosened to allow removal of escutcheon.
6. Examine inside of escutcheon ring and scrape away old putty.
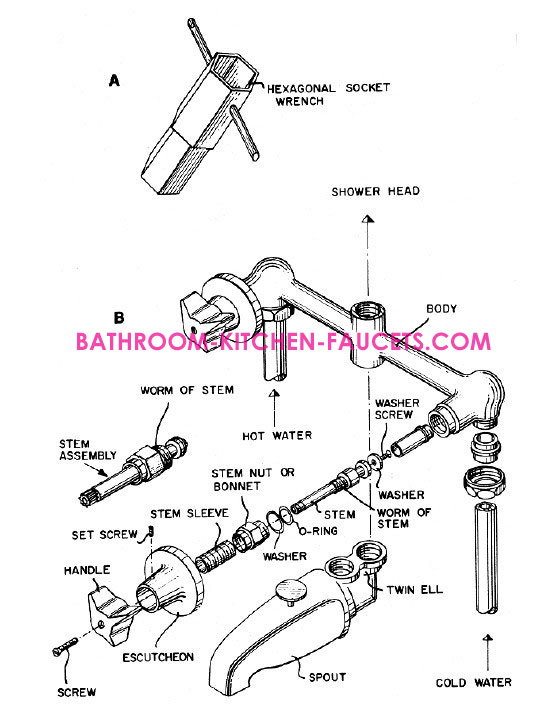
7. Remove stem sleeve by placing a cloth or rag over it, grasping it with pliers, and turning counterclockwise.
8. Remove bonnet or stem nut.
9. If bonnet is hexagonally shaped, select a socket wrench to fit and remove by turning counterclockwise.
10. If wrench will not fit around bonnet because of surrounding tile and plaster, it will be necessary to remove enough of the plaster to allow wrench to fit around bonnet. Use cold chisel and hammer.
11. If bonnet is not hexagonal but has two flat sides, try to fit either pliers or wrench around flat sides and turn out in counterclockwise direction.
12. Examine washer on the shoulder of bonnet. If worn, replace.
13. At the very bottom of bonnet, there is an “O” ring washer. Remove and examine. If worn, replace.
14. Place faucet handle onto valve stem and remove by turning either clockwise or counterclockwise as may be the case.
15. Unscrew screw at bottom of stem by turning counterclockwise.
16. Examine washer held in place by screw, and, if worn, replace.
17. If worm section of stem is worn, the entire stem should be replaced.
Note: When ordering new parts, it is advisable to take all old parts to the hardware store so you will get perfectly matched replacements.
18. Examine inside of valve body with flashlight. If valve seat is etched and worn, it may be necessary to regrind the seat. If valve seat is made of plastic, do not disturb.
19. After all steps have been completed and all new parts and washers have been replaced, reassemble entire valve body, as shown in the Figure. Tighten parts by turning in the opposite direction as when you disassembled the unit. Make sure all fittings are tight and snug, but do not over tighten, as this will damage valve body.
20. Fill escutcheon ring with putty and fit over valve stem and stem sleeve. Then press escutcheon ring against wall until putty oozes out from the edges. This will prevent leakage from tub into walls.
21. Reset escutcheon in place.
22. Clean away putty from tiles.
23. Place valve handle on valve stem and screw into position.
24. Turn on water supply and test for leakage.

